Indian and Chinese (653 BCE - 1900 CE)
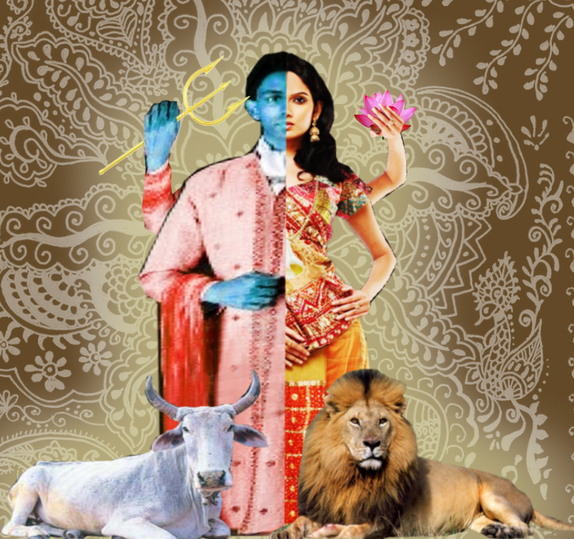
First, we competed projects representing Indian culture. Popular forms of Indian art during this time period are architectural buildings, such as temples built to particular deities, or other holy buildings, elaborate sculpture, including rock and bronze sculpture, and Indian frescoes. A major aspect of Indian art from during this time period is depictions of Hindu deities, especially in painting and statues. For my project, I chose to create a depiction of a deity named Ardhanarishvara, who is characteristically known for being half male and half female. The combined form of the genders is represents how in the Hindu religion, there is unity among all, including the concepts of masculinity and femininity.
I created by project by using pictures from the internet, and removing the background and half of the figure with the Pen tool, and using the Transform to tool to fuse the images into one. I used a Color Balance Adjustment Filter, to tint the male half's skin traditionally blue. Then, I again used the Pen tool to cut out the different objects also traditionally in depictions of this deity, and the Move tool to position them in place. When I was finished with all of the parts of the figures, I merged them into one layer, and I applied an Outer Glow. In the brown background, I applied a Henna design, which I had defined as a brush.
I created by project by using pictures from the internet, and removing the background and half of the figure with the Pen tool, and using the Transform to tool to fuse the images into one. I used a Color Balance Adjustment Filter, to tint the male half's skin traditionally blue. Then, I again used the Pen tool to cut out the different objects also traditionally in depictions of this deity, and the Move tool to position them in place. When I was finished with all of the parts of the figures, I merged them into one layer, and I applied an Outer Glow. In the brown background, I applied a Henna design, which I had defined as a brush.
Deity Project
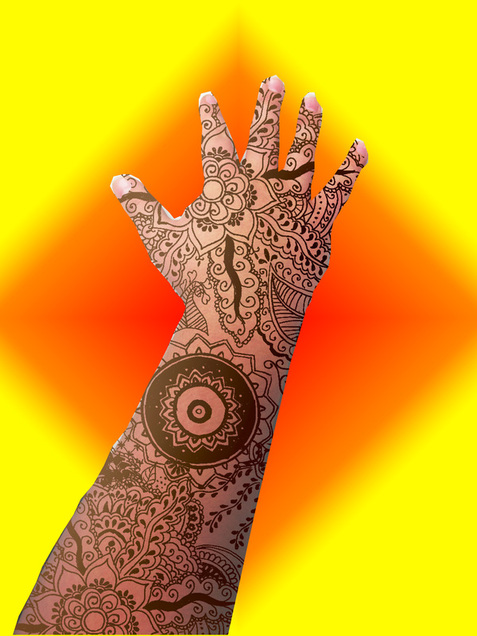
For this project, I was supposed to apply Henna, which is also a very important part of Hindu religious ceremonies such as marriage, in addition to being an aesthetic custom, to myself, digitally. First, I took a picture of my hand, retrieved the photo, and cut away the background using the Pen tool after I had opened it in Photoshop. I found a Henna design online, make it a brush, and applied that brush all over my hand, using the Magic Selection Tool, to make sure it stayed only within the borders of my skin. Then in the background I applied a Gradient Overlay.
Henna Project
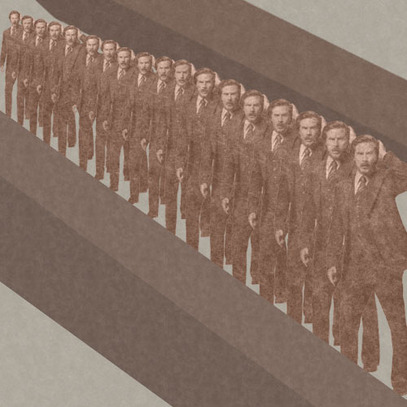
Ancient Chinese art, which was very advanced for its respective time period, mainly consisted of the famous Chines style calligraphy and painting, exquisite pottery, and advanced bronze casting. However, one of the most well-known ancient Chinese creations is Q'in Shihuangdi's Terra Cotta Army. It consists of thousands of clay soldiers and calvary, designed for the purpose of protecting him, the first Chinese emperor, into the after life. Each of these detailed soldiers is unique, which makes the production of so many statues even more astonishing.
In creating our own Terra Cotta Army, I decided to use Will Ferrel. I first applied a Color Overlay Adjustment Layer and a Pattern Overlay onto the figure after I cut him out from the background using the Pen tool. Then, created many copies of this layer, and used the Transform tool to make each following statue proportionally smaller than the last, and position them behind the larger one in front of then. I then used the Rectangular Marquee tool and a Transform tool to make the surrounding walls. Then, I filled the background in with a light brown and the same Pattern Overlay.
In creating our own Terra Cotta Army, I decided to use Will Ferrel. I first applied a Color Overlay Adjustment Layer and a Pattern Overlay onto the figure after I cut him out from the background using the Pen tool. Then, created many copies of this layer, and used the Transform tool to make each following statue proportionally smaller than the last, and position them behind the larger one in front of then. I then used the Rectangular Marquee tool and a Transform tool to make the surrounding walls. Then, I filled the background in with a light brown and the same Pattern Overlay.
Terra Cotta Army Project
