Greek and Hellenistic Era (850 BCE-31 BCE)
Though Ancient Greek culture is rich with great art, in this Computer design class, we are going to focus on just the Greek architecture. Many of the buildings were religious temples to the gods, in some cases with beautiful statues. Defining aspects of these buildings is their symmetry, which is in it self a tribute to the ancient Greeks advanced understanding of engineering and geometry, as well as the impressive fluted columns. With many famous buildings, such as the Parthenon, that have even survived into today's times, the magnificence and of Greek architecture remains present in our lives. For example, many of the buildings in Washington D.C. were built in the Greek style. There are three main types of Greek architecture. Here is a short explanation of each.
Types of Greek Architecture:
To create this Ionic-style temple, I used the Rectangular Marquee tool to create the building and the columns, filling it in with corresponding shades of darker or lighter shades and slanting them with the Transform tool to give it the 3-dimmensional appearance. To make it look as if it was make of stone, I applied a Pattern Overlay. Then, I found pictures of the volutes and the base from the internet, cut them from their background using the Pen tool, and used the Transform tool to size and position them accordingly. I used the burn tool to match these added pieces to the shade of the other parts of the building. Lastly, I used what we learned about creating a grass texture, to make the ground. Then, I filled in the rest of the space with blue to make the sky.
Types of Greek Architecture:
- Doric- considered the simplest of all the styles, Doric architecture is known for having a smooth capital, or highest part of the column, attached a square abacus, or rectangular prism right above it that has the same width of the column, which all support a a horizontal beam, called a architrave. The Parthenon was built in this style.
- Ionic- More ornately detailed than Doric architecture but still below Corinthian in complexity, aspects such as curvy volutes, which are located at the top of the column, and a base at the bottom of the column that is wider at the portion attached to the krepis (or foundation of building) than it is at the portion attached to the column, are all characteristic of Ionic architecture.
- Corinthian- The most sophisticated and detailed of the three architectural styles, it contains capitals, again the highest part of the column, that are ornately carved and designed, often with leaves and scrolls. Another example of complexity lie in examples such as the building above the far left, where instead of a fluted column, detailed statues of gods and goddesses hold up the building.
To create this Ionic-style temple, I used the Rectangular Marquee tool to create the building and the columns, filling it in with corresponding shades of darker or lighter shades and slanting them with the Transform tool to give it the 3-dimmensional appearance. To make it look as if it was make of stone, I applied a Pattern Overlay. Then, I found pictures of the volutes and the base from the internet, cut them from their background using the Pen tool, and used the Transform tool to size and position them accordingly. I used the burn tool to match these added pieces to the shade of the other parts of the building. Lastly, I used what we learned about creating a grass texture, to make the ground. Then, I filled in the rest of the space with blue to make the sky.
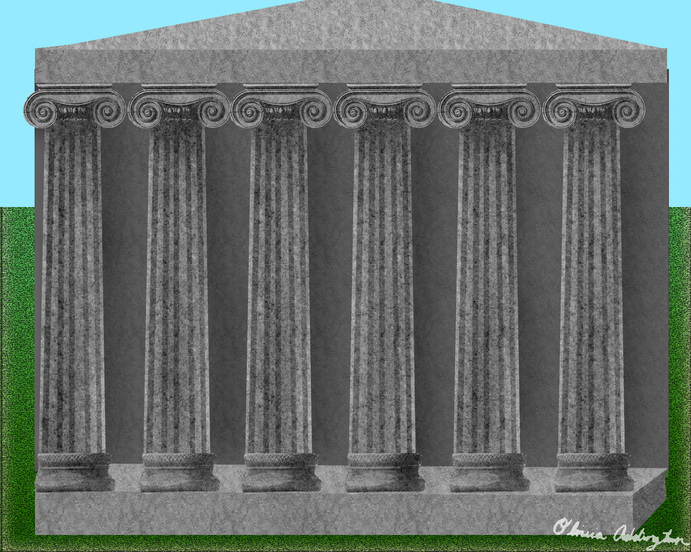
Example of Ionic Architecture
300- movie Style
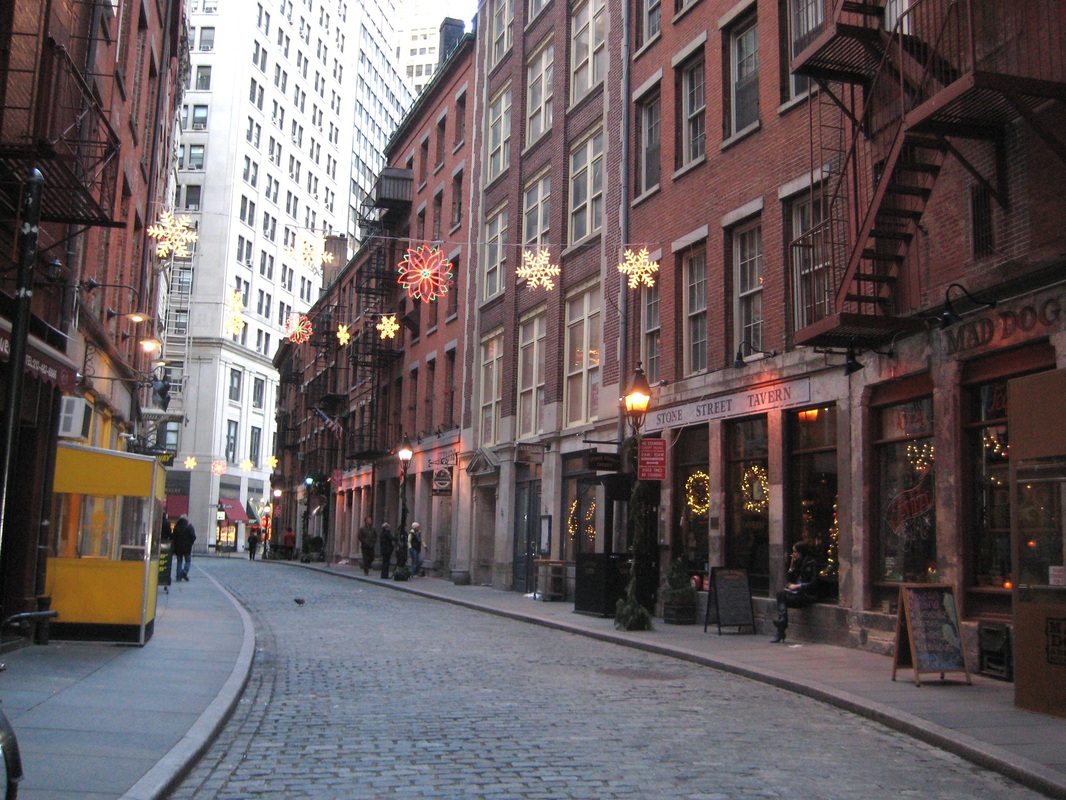
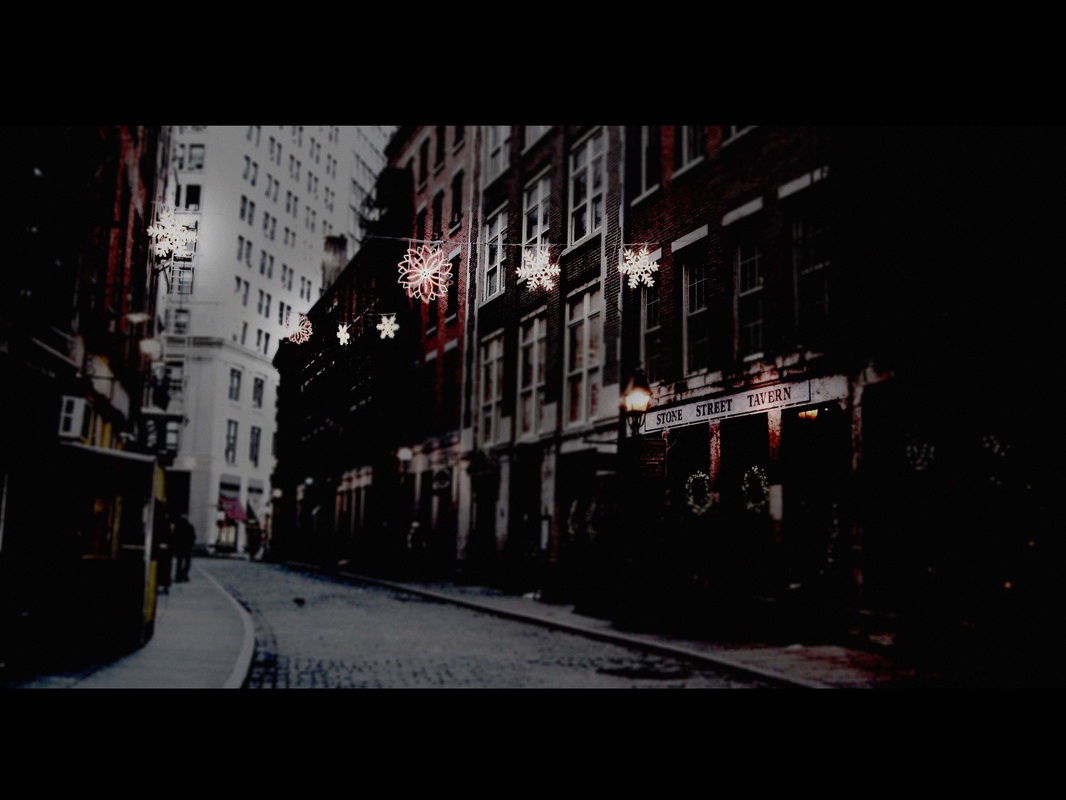
To do this here were the basic steps: 1. Increase Hue, Decrease Saturation 2. Adjust Exposure- increase exposure, decrease offset and gamma 3. New Layer>Lens Blur with Overlay Blending Mode 4. Layer Mask, Black brush over focal point 5. New Layer, all black - low opacity, large eraser in center (black on edges) 6. Flatten image, Noise Filter 7. Black bars at top and bottom 8. Optional- add blue color twist
To do this here were the basic steps: 1. Increase Hue, Decrease Saturation 2. Adjust Exposure- increase exposure, decrease offset and gamma 3. New Layer>Lens Blur with Overlay Blending Mode 4. Layer Mask, Black brush over focal point 5. New Layer, all black - low opacity, large eraser in center (black on edges) 6. Flatten image, Noise Filter 7. Black bars at top and bottom 8. Optional- add blue color twist
|
|
Before
|
After
|
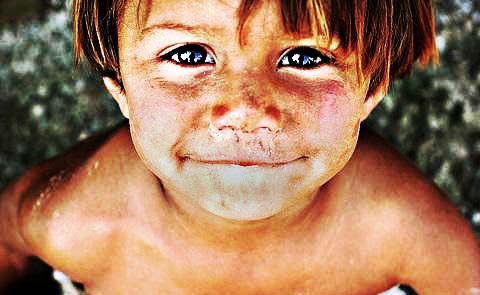
Dragan-style Portrait
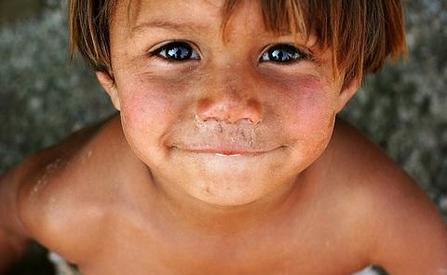
Here are the main steps: 1. Increasing contrast with Levels Adjustment 2. Decreasing Saturation with Hue/Saturation Adjustment Layer 3. Adjust contrast and highlights with Curves (make an wavy uphill). 4. New layer>High Pass Filter with Overlay Blending Mode 4. Burn tools to darken "hot" areas of skin, Dodge tool to brighten eyes.
Here are the main steps: 1. Increasing contrast with Levels Adjustment 2. Decreasing Saturation with Hue/Saturation Adjustment Layer 3. Adjust contrast and highlights with Curves (make an wavy uphill). 4. New layer>High Pass Filter with Overlay Blending Mode 4. Burn tools to darken "hot" areas of skin, Dodge tool to brighten eyes.
